
Visual Diagram
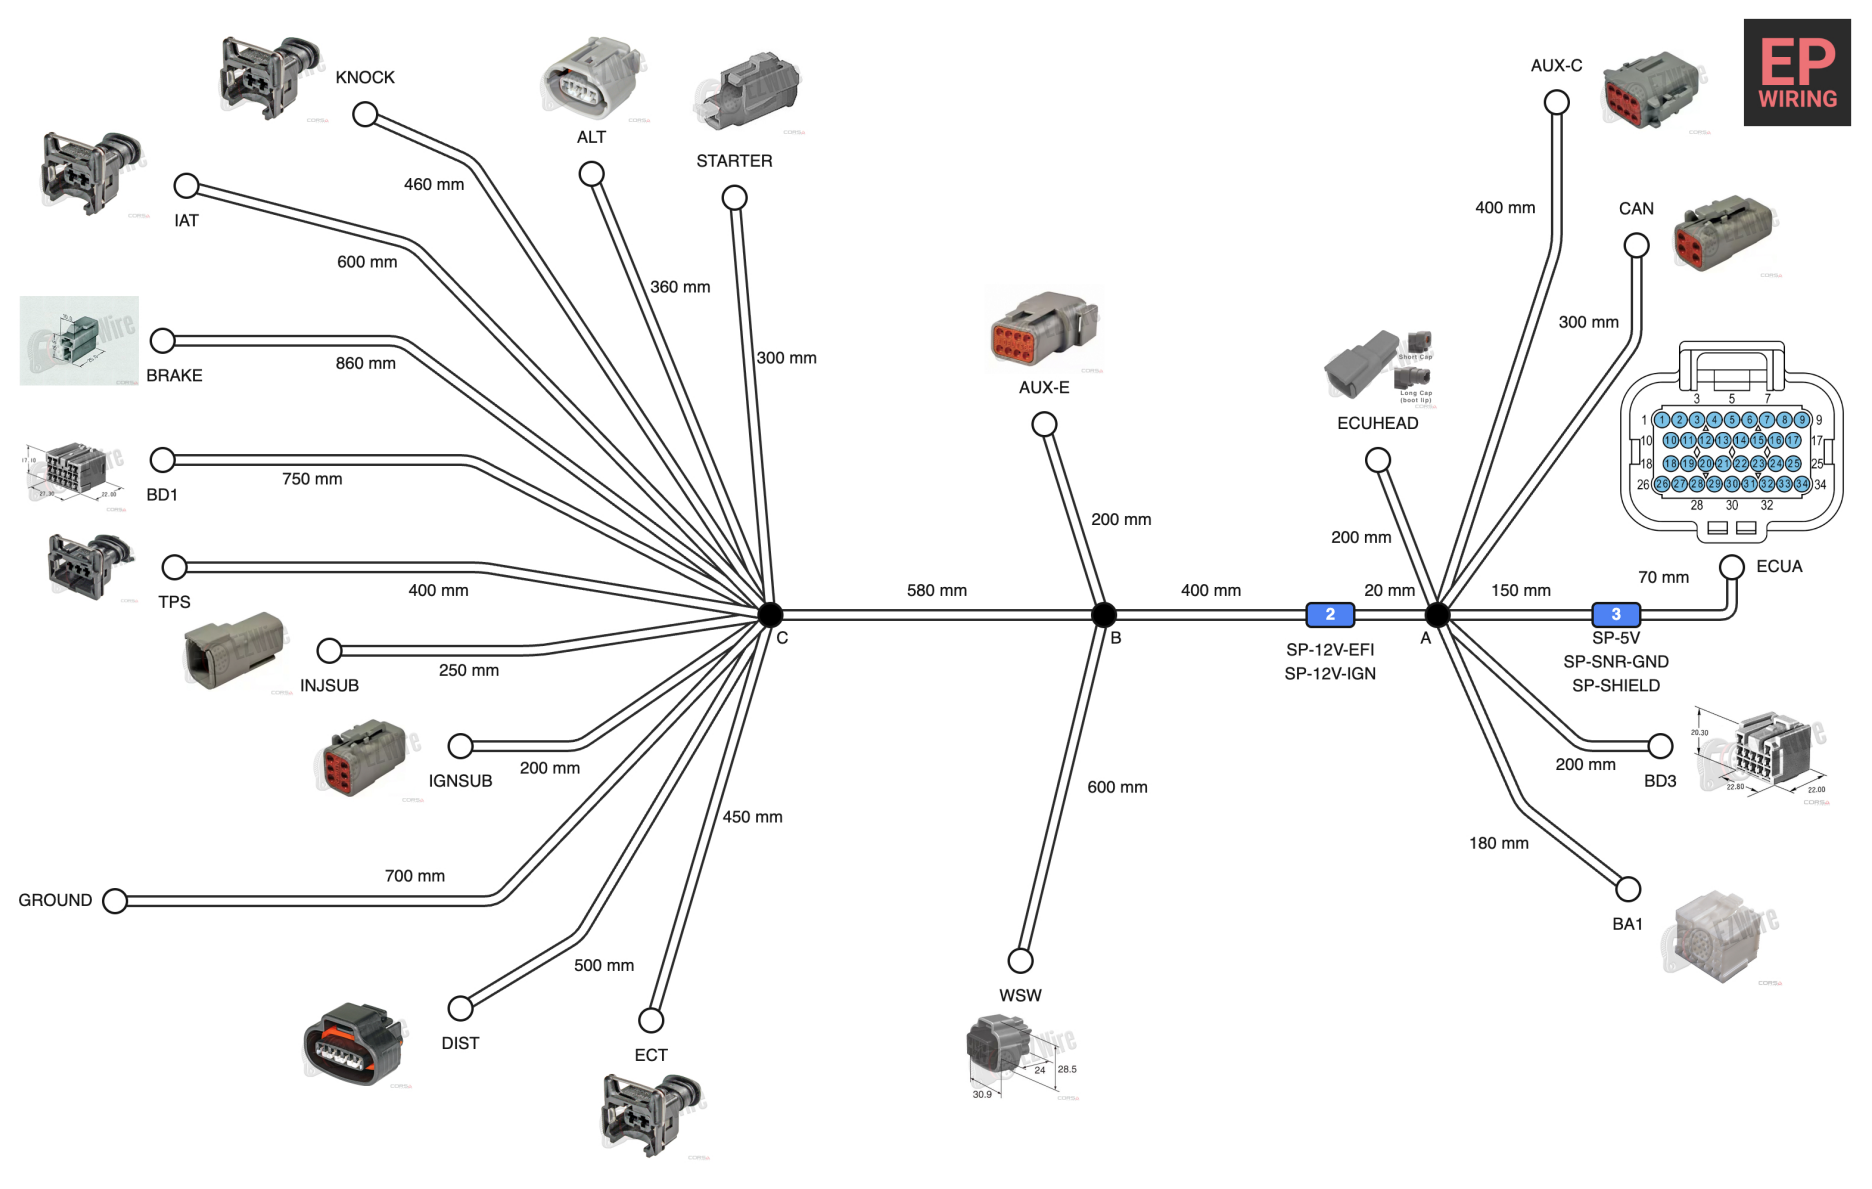
A drag-and-drop canvas for laying out your wiring harness visually.
Last updated: September 11, 2026
Wherever this guide says right-click, Mac trackpad users can hold Control and click (or use a two-finger tap, if enabled in System Settings) to get the same menu.
Page Setup
Click Page Setup in the toolbar to choose your canvas page size. The more complex the harness, the larger the page size you'll want.
Zoom
Use the zoom in/out controls in the toolbar to adjust your view of the canvas.
PDF Export
Export your finished diagram to PDF using the export button in the toolbar.
Moving Objects
Click and drag from the centre of any connector, splice, label, or logo to reposition it. Moving a connector circle or splice rectangle also moves its attached images and labels together as a group.
Independent Movement
Connector images and labels can be dragged independently of the connector circle, letting you fine-tune their position without moving the connector itself.
Selecting Multiple Objects
Click and drag on an empty area of the canvas to draw a selection box. Any connectors, splices, and branches inside the box are selected together, and their attached images and labels come along too. Drag any selected object to move the whole group at once, keeping their relative positions intact - handy for repositioning a section of the harness without rearranging each object individually.
Resize
Click a connector image to reveal its resize handles, then click and drag a handle to make it larger or smaller.
Hide & Restore
Right-click a connector image and select Hide Image to remove it from view. To bring it back, right-click the connector circle and select Restore connector image.
Change Image View
Right-click a connector image and select Change Image to switch between available views, for example swapping from the main image to the rear-face image.
Creating a Length
Hover over the edge of a connector, splice, or branch until the arrow icon appears, then drag to another connector, splice, or branch. A pop-up will ask for the length value before it is saved.
Adding Bends (Waypoints)
Click anywhere along a length line to add a waypoint, then drag that point to route the wire around obstacles. Double-click a waypoint to remove it.
Drag one splice on top of another - an orange highlight indicates a valid merge point. Confirm the merge in the pop-up, or cancel to undo. Merged splices can be separated again by right-clicking the combined node and selecting Split Node. Solder sleeves behave the same way, and can be merged together with splices onto a single node.
Adding a Note
Click Add Note in the toolbar to drop a note at the centre of the current view, or right-click an empty area of the canvas and choose Add Note to place one exactly where you clicked. The edit dialog opens automatically so you can type the text.
Editing a Note
Double-click a note to reopen the edit dialog, or right-click it and choose Edit Note. From the dialog you can update the text, pick a font size (SM, MD, LG, XL), and set text alignment (left, centre, or right).
Moving & Resizing
Drag from the centre of a note to move it. Click a note to reveal its resize handles, then drag a handle to make the note larger or smaller.
Pointer Arrows
Hover the edge of a note until the arrow icon appears, then drag onto any connector, splice, branch, length, or logo to draw a pointer at that element. To remove the pointer, right-click the arrow line and choose Remove Pointer.
Deleting a Note
Right-click a note and choose Delete Note, or open the edit dialog and use the delete option there.
Hide Measurements
SHOP / PRO users can toggle measurements off from the diagram view, hiding proprietary measurement data when sharing the diagram externally.
Cut List
Generating a cut list creates lengths based on the shortest available path through the harness, derived directly from the diagram layout.